
This is a guest entry written by Marc-Étienne Léveillé. His views and opinions are his own and not those of Hex-Rays. Any technical or maintenance issues regarding the code herein should be directed to the author.
IPyIDA – a better console for IDA Pro using IPython and Jupyter Notebook
Unlike most plugins, IPyIDA is not meant to solve a reverse engineering problem but to help you solve reverse engineering problems. IPyIDA integrates the power of Jupyter‘s IPython console into IDA Pro, making prototyping and Python plugin and script development more friendly. A subgoal is also to support all environments and make it as easy as possible for users to install and use IPyIDA. After it’s installed using a few clicks and keystrokes, Shift-. opens the IPython console right into IDA Pro, regardless of your version of IDA Pro, Python or operating system.
Eight years ago, we released the first version of IPyIDA, which was the first cross-platform, Python-only solution to integrate IPython inside IDA Pro. As time passed, we fixed bugs along the way as they were reported, and added support for newer versions of IDA Pro as they were released. Today, we finally release version 2.0, packed with new features, such as support for Jupyter Notebook, better display of pointers and byte strings, and the ability to click on addresses as in the built-in IDA console.
Some history
To be fair, we are not the first to solve part of this problem. There was (and still is) an existing project with a similar goal: IDA IPython. However, not everyone is using IDA Pro on Windows, which was the only platform supported by IDA IPython at the time we started working on IPyIDA. Furthermore, it wasn’t easy to install and required users to compile the plugin themselves and manage dependencies. We figured there might be a better way and having solved the various problems for ourselves, why not share it with everyone else?
We don’t see ourselves as builders, but rather as plumbers connecting existing projects and making them talk to each other. We’re not saying this is without pain: the parts we used were not necessarily meant to work together when they were originally built and they make assumptions that must be “fixed” by our plumbing.
The basics
Installing IPyIDA
IPyIDA provides a script to install IPyIDA and its dependencies. We could write step-by-step instructions but why not make a script if the instructions are simply a bunch of commands to run one after another? The script also takes care of some edge cases to support different environments. The script is commented so anyone can read it and use it as instructions if they prefer to turn off the autopilot and fine-tune what’s required to run IPyIDA.
IPyIDA is distributed as a Python package on PyPI and sources are on ESET’s GitHub.
Although not mandatory, it is recommended to set up a virtual environment to run IDA Python. We provide instructions for creating and activating such environment in README.virtualenv.adoc.
Using IPyIDA
After IPyIDA is loaded,Shift-. opens an IPython console where you have access to all the IDA Python modules. None of them are imported into the default namespace; you’ll need to import them first. To have anything loaded in the console when it is started, you can create a
file, which is loaded by IPyIDA.
All IPython features should work, including tab-completion, online help, and even graphics and plots.
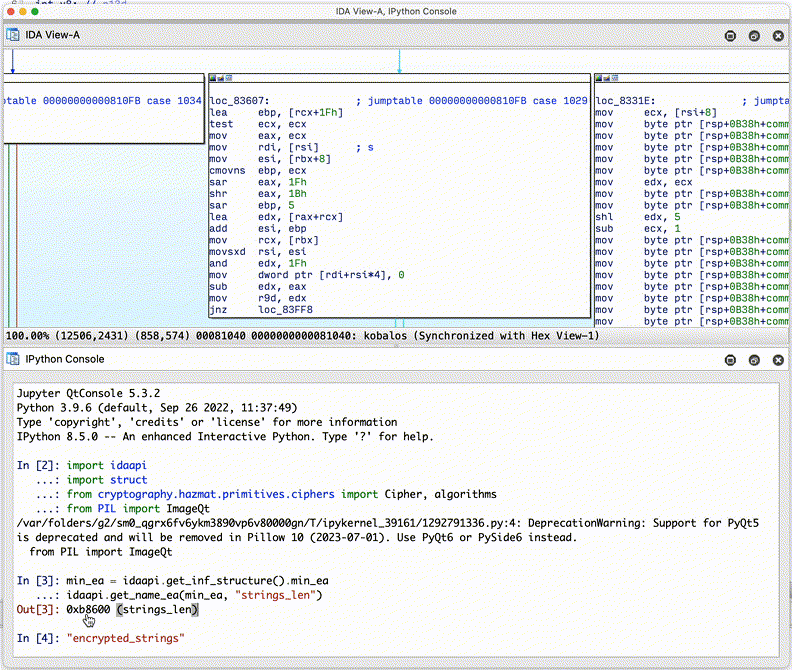
There are two independent components to IPyIDA: the Jupyter kernel, running inside IDA Python, and the QtConsole, which fits nicely inside a regular IDA Pro panel. The latter simply acts as a frontend that connects to the kernel. This means you may also use other frontends to connect to the kernel from outside IDA Pro, such as a Jupyer Console inside a terminal session, using the jupyter console --existing command.
Here are a few examples where IPyIDA is useful while working with IDA Python:
- Pressing tab at any moment will try to complete what is being typed or suggest possible variable, function, method, or constant names. If Jedi is installed, tab-completion is even more powerful.
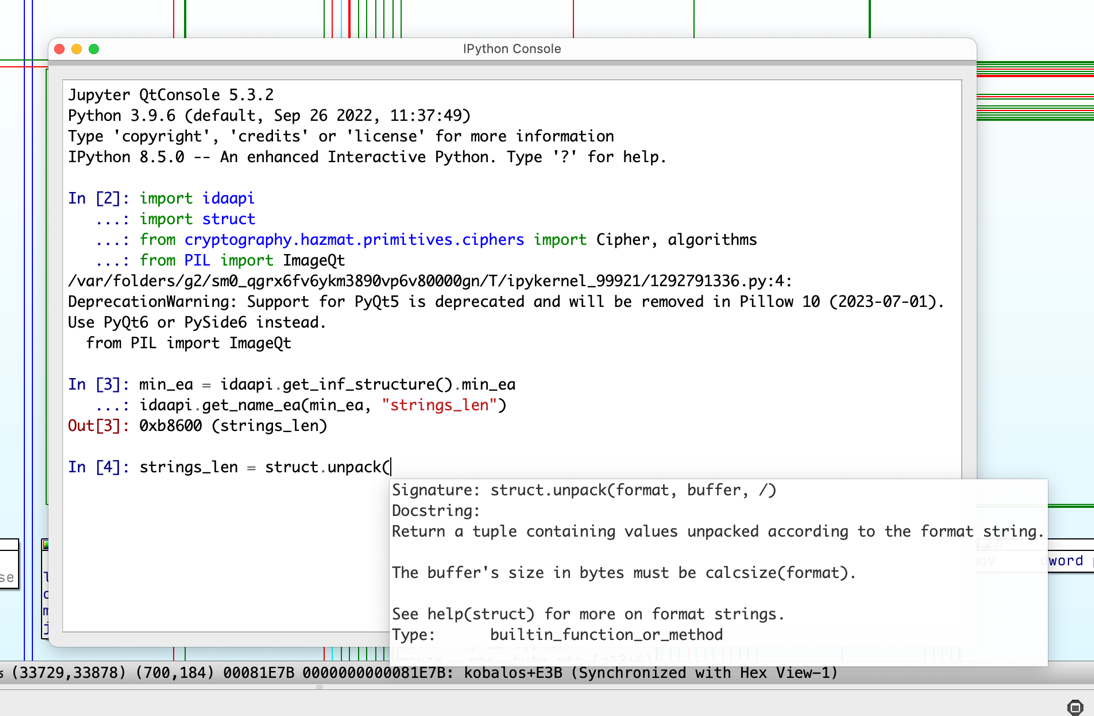
- Ending the line with a question mark (
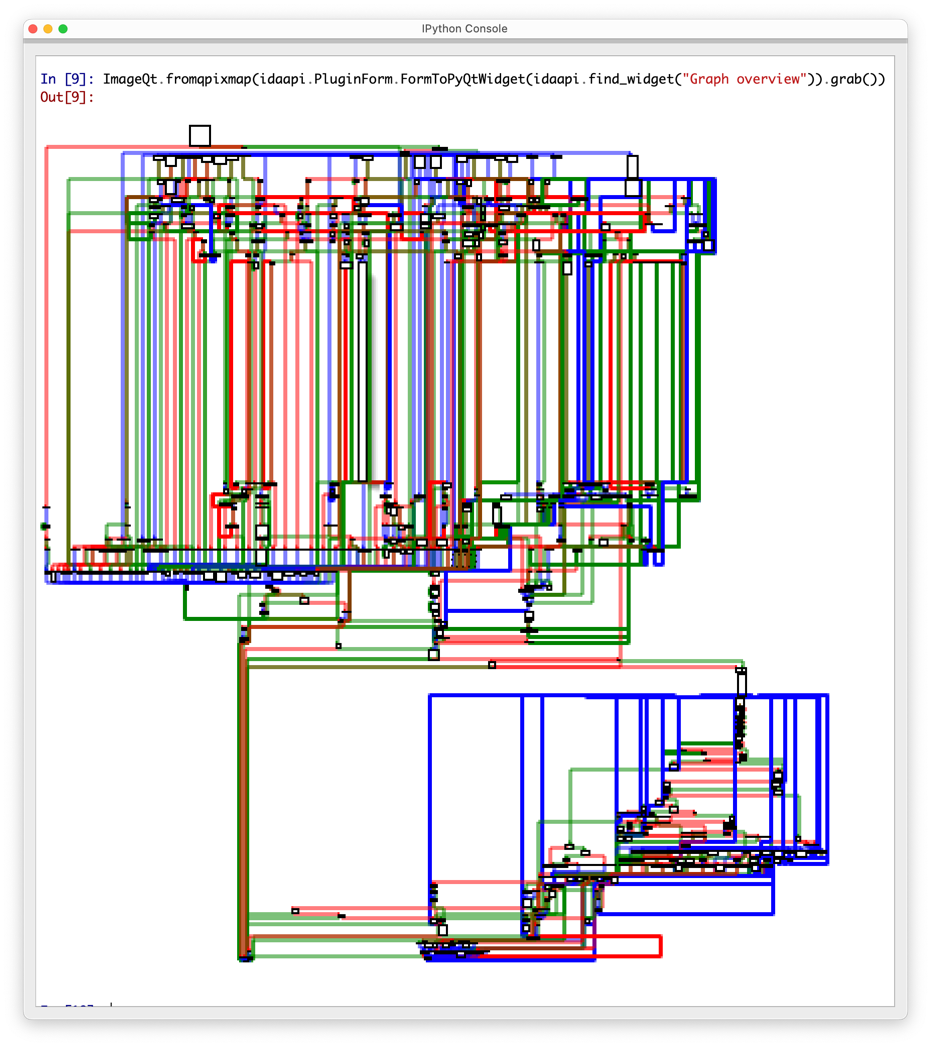
?) will show the documentation for the prompted object. In the screenshot above,sark.Function?displays the docstring and the prototype for the class constructor. Using two question marks (??) additionally shows the Python source code as well. - Using Qt’s QWidget::grab() method, it is possible to create a screenshot of any IDA Pro panel. The example above finds the “Graph overview” panel using find_widget to display the control flow graph. Pillow is required to convert Qt’s bitmap to a format compatible with the Jupyter console.
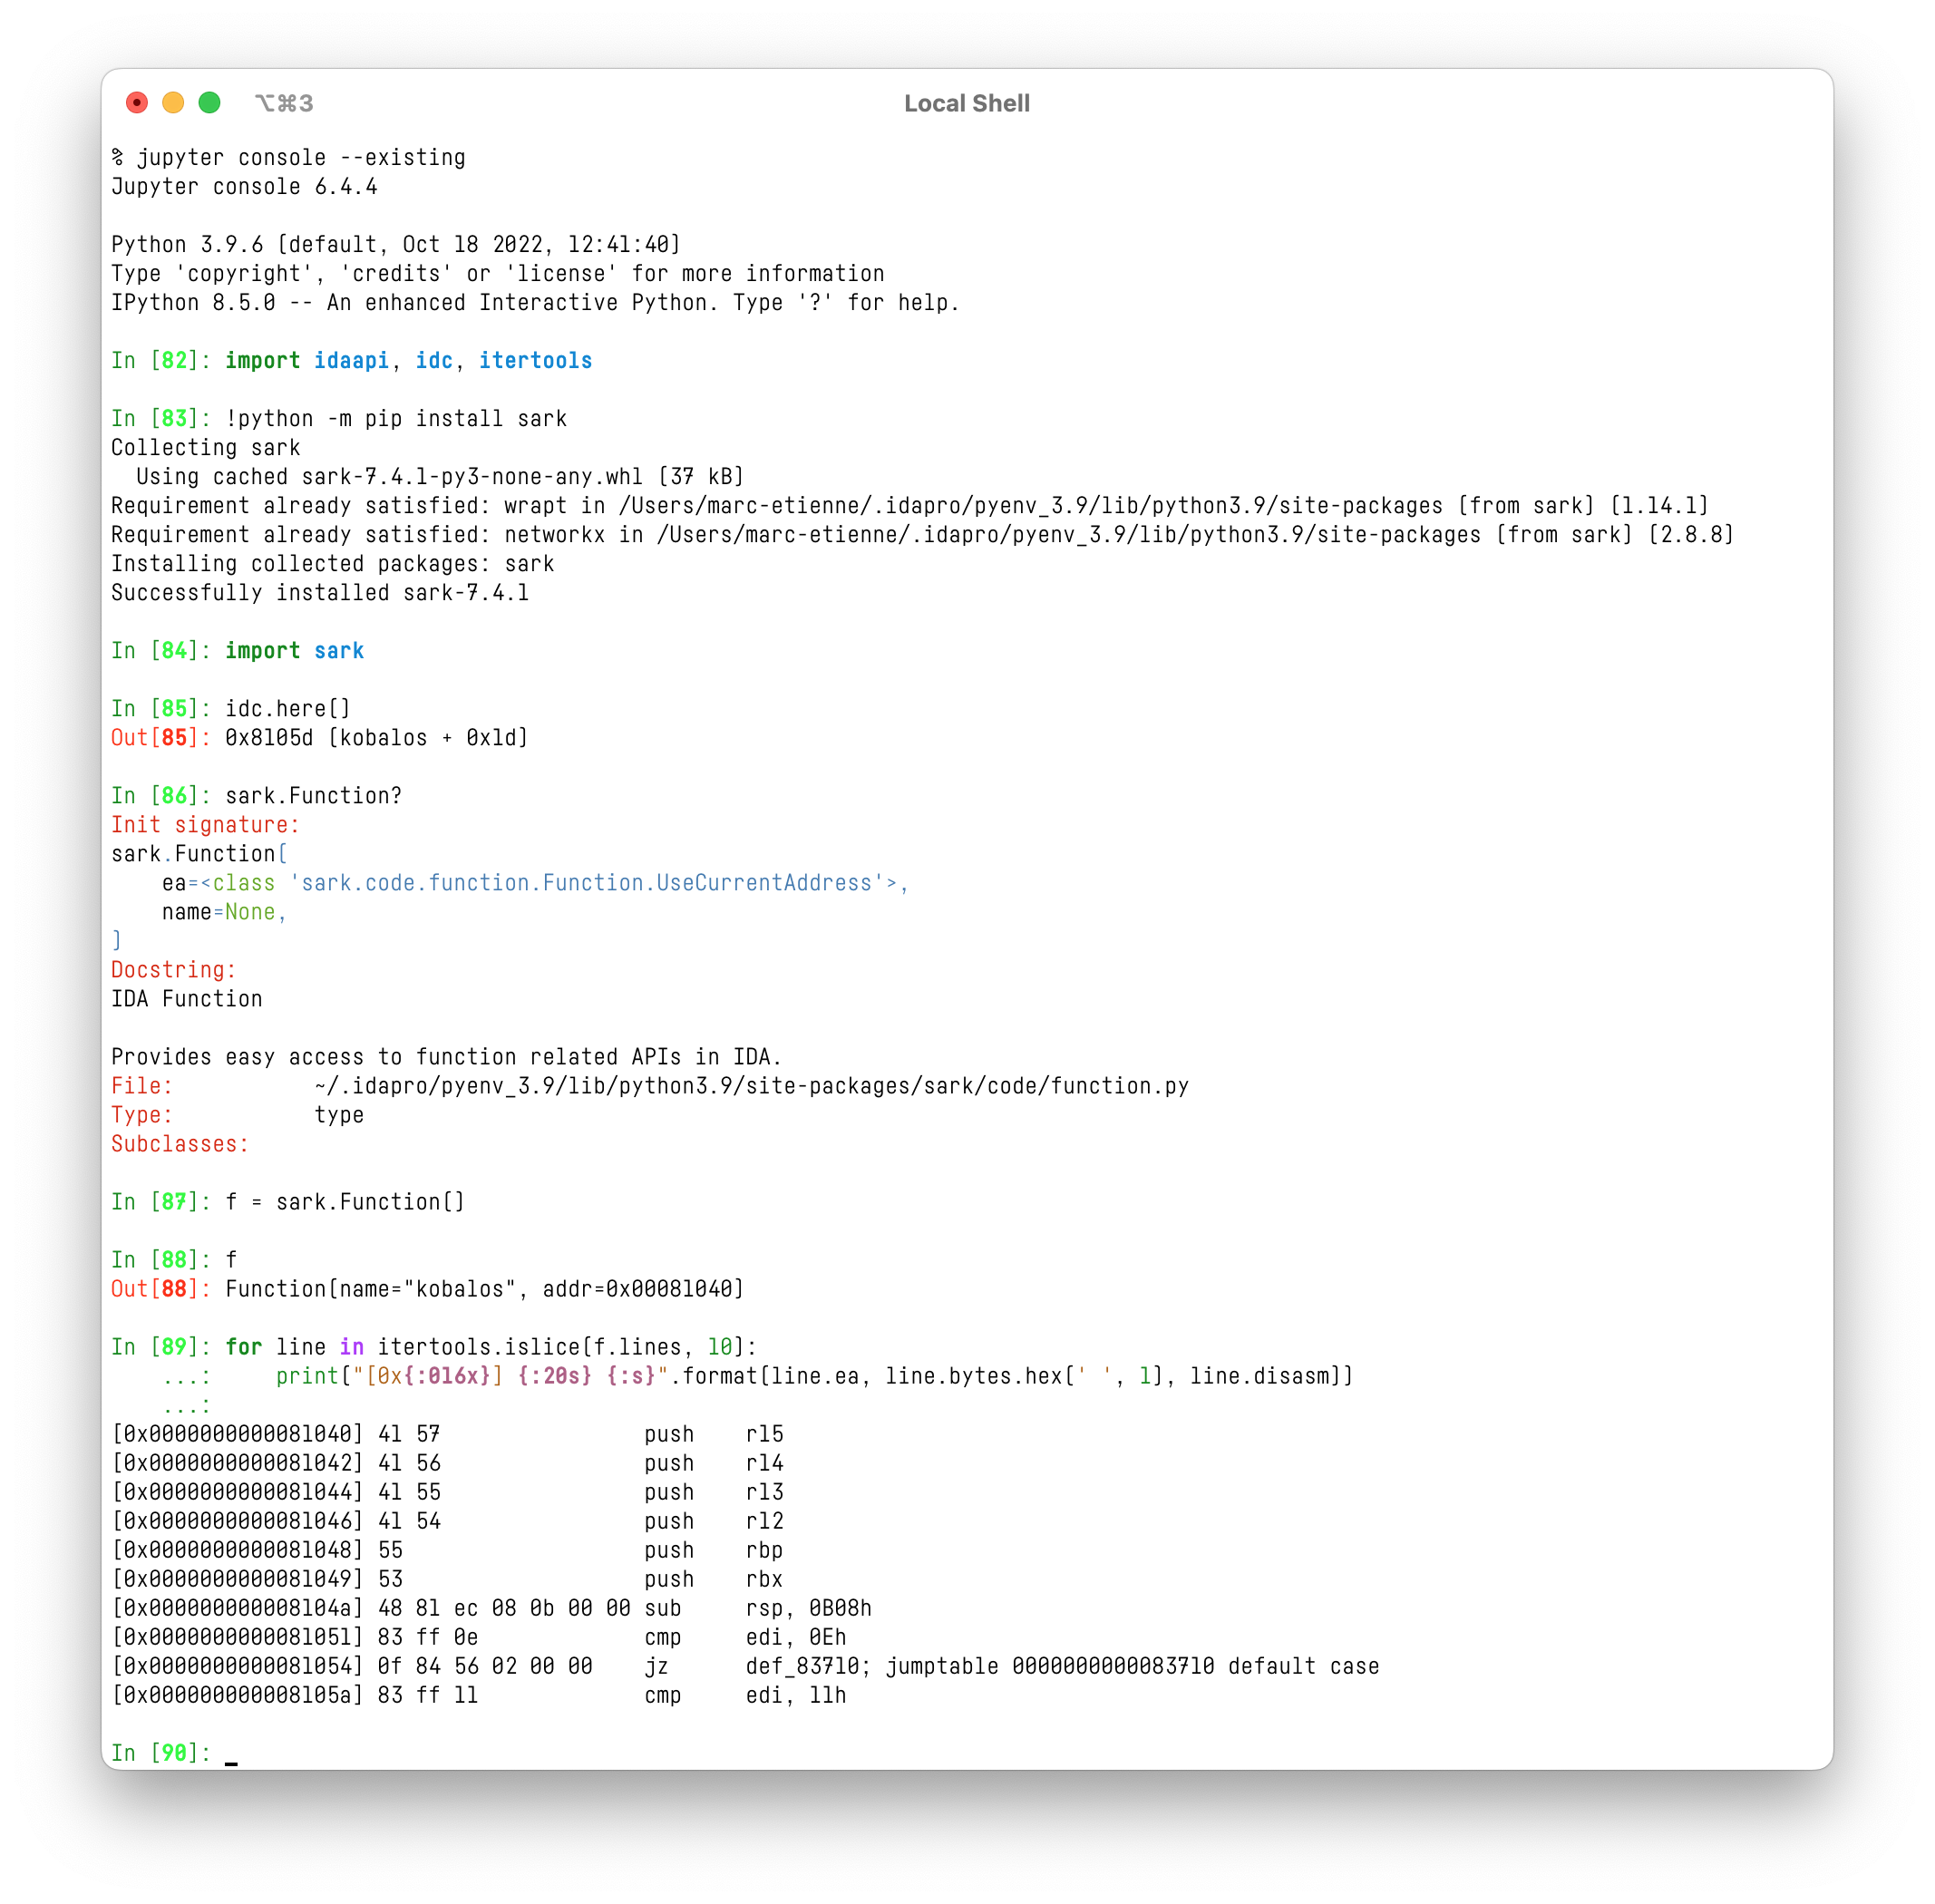
- It is possible the invoke external shell commands by starting the input with an exclamation mark (
!). In the example above,pipis invoked to install Sark before using it. - And many more! Jupyter has a lot to offer and a large community of users. IPyIDA is just a tool to bring all these features to simplify your workflow.
New features in IPyIDA 2.0
Jupyter Notebook, finally!
Adding support for Jupyter Notebook was the most requested feature, both from colleagues at ESET and from users who reached out to us online.
The existing solutions required starting IDA Pro from a Notebook, which didn’t seem intuitive and not exactly how we wanted things to work. Jupyter Notebook is designed to manage the life cycle of a kernel, from its creation to termination. There is no built-in way to connect to an existing Jupyter kernel. This happens to be a problem for all Jupyter kernels embedded in applications, that would like to be able to create notebooks that connects back to them.
Our solution to this problem was to create a proxy kernel, which Jupyter Notebook can create and destroy at will. This proxy simply connects back to our embedded kernel, or any other running kernel, and proxies all messages. More plumbing!
Since this solution should work not only for IPyIDA but also for other embedded kernels, we have released this proxy kernel as an independent Python package: jupyter-kernel-proxy.
Using this proxy, it is possible to create a new Jupyter Notebook from the IPyIDA console using the %open_notebook magic command. IPyIDA takes care of installing dependencies and starting a server if necessary, then opens a browser to a new .ipynb file right where your .idb is. This session should be connected to the kernel running in IDA.
Note that session history is not transferred to the notebook: the animated GIF above opens an existing notebook that is already filled with content.
Enjoy sharing Notebook files created from IDA Pro! The notebook we created for this article is available here: https://gist.github.com/eset-research/5f6ca054e887cea61eb4b5e049134ccb.
Other new things
Playing with byte arrays is something fairly common when extracting parts of an analyzed binary file. We made it more convenient to see their value by displaying a hex dump when the array doesn’t contain ASCII-only content.
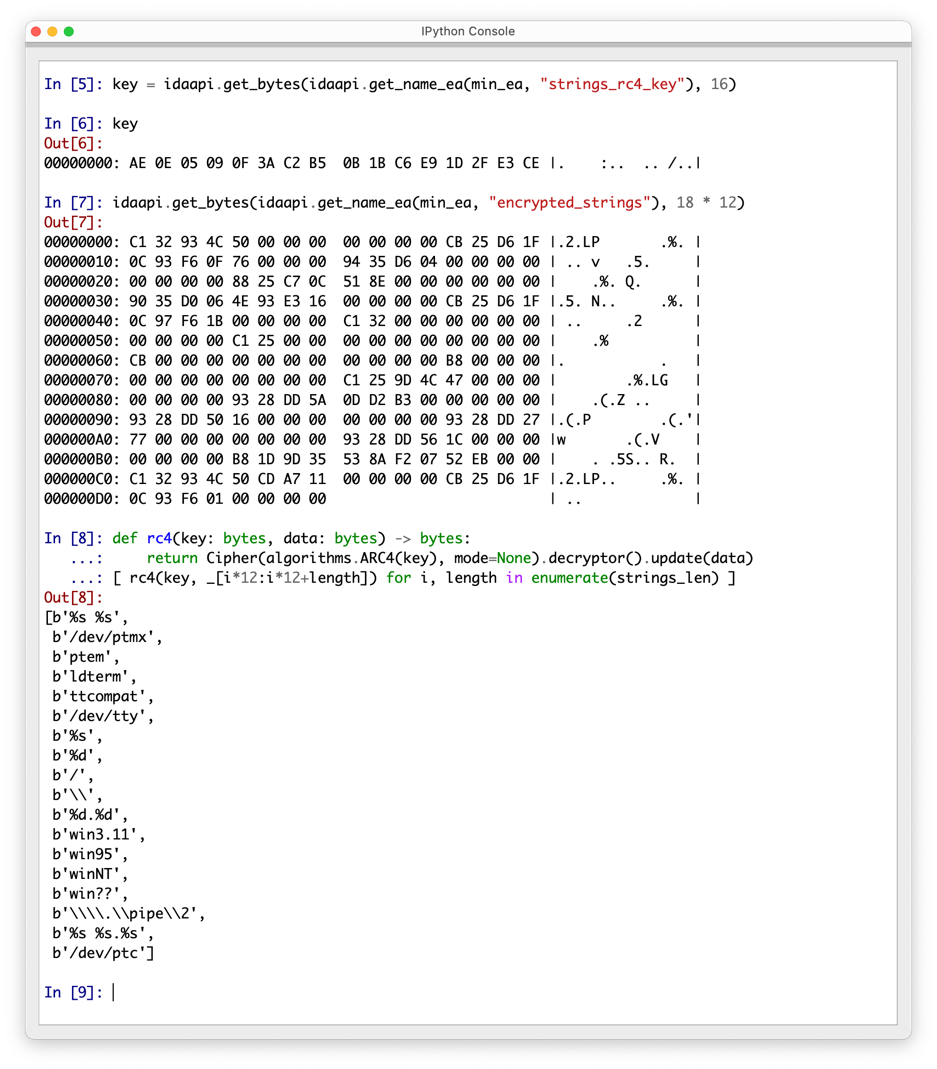
It is quite common that addresses are in the input or output of Python commands. In these cases, IPyIDA now displays the more meaningful symbol name and offset next to such pointers.
Furthermore, IPyIDA now supports Ctrl-clicking (Cmd-click on macOS) to jump to the address in the disassembly view. This behavior is similar to double-clicking on an address or variable names in IDA Pro’s built-in console.
We hope you’ll embrace IPyIDA and feel free to contribute and report (or fix!) any issue you encounter. We’ll do our best to get back to you in a timely manner. Happy reversing and Python scripting in IDA!